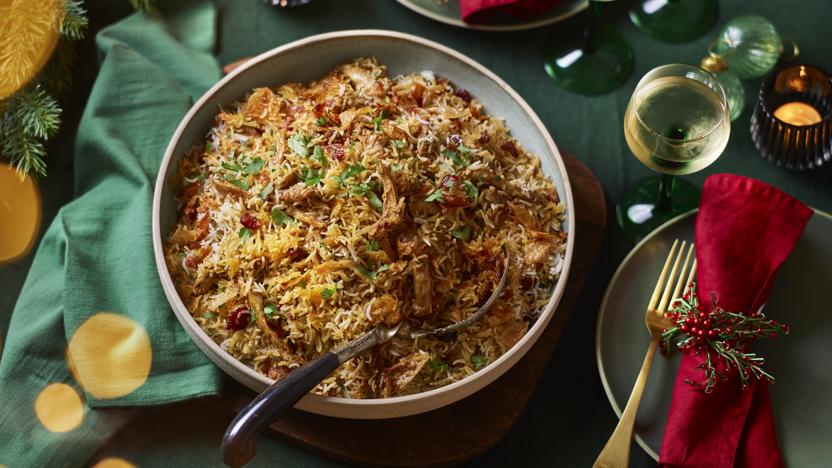
Indonesian-inspired chicken biryani
I know a biryani sounds like a daunting undertaking, but it really doesn’t have to be. For one thing, you cook the chicken a day (or up to a couple of days) in advance, which breaks up the process into manageable tasks. Furthermore, not only will the flavours deepen and mellow overnight, but the chicken will be gorgously tender. On top of which, it leaves you to do no more on the day itself than cook the rice – and for just two minutes! – then layer it up in a pan with the gently reheated chicken and steam it. And the marinade you start the chicken off with is an easy affair that relies predominantly on the punchy Indonesian chilli paste sambal oelek (though other chilli pastes could be substituted) and kecap manis, which is a sweet and treacly soy sauce.
Just one thing before you get started: the chicken thighs absolutely must be on the bone, even if you plan to debone them before layering up them up with the rice: if you use thigh fillets the texture will be disappointingly dry and stringy. You have been warned!
Ingredients
For the marinade
- 150g/5½oz natural plain yoghurt
- 4 tbsp sambal olek chilli paste
- 2 tbsp kecap manis (also known as ketjap manis)
- 1 tbsp tamarind paste
- 1 tbsp freshly grated ginger
- 2 fat garlic cloves, peeled and grated
- 2 tsp ground cinnamon
- 1 tsp ground cardamom
- 1 tsp ground turmeric
- ½ tsp fine sea salt
- 1 tbsp vegetable oil
For the chicken
- 10 chicken thighs, bone in, and skin removed and reserved, approx. 1.2kg/2lb 11oz total weight (use 12 chicken thighs if using smaller-sized supermarket ones)
- 4 tbsp vegetable oil
- 3 medium onions (approx. 500g/1lb 2oz), cut into fine half moons
For the rice
- 4 bruised cardamom pods
- 2 short or 1 long cinnamon stick
- 2 cloves
- 3 star anise
- 25g/1oz desiccated coconut
- 2 tsp pink peppercorns
- 2 tbsp fine sea salt
- 2 tsp sesame oil
- 1 tsp lime juice
- 600g/1lb 5oz basmati rice
For layering up
- 1 tsp sesame oil
- 2 tsp cumin seeds, toasted
- 25g/1oz desiccated coconut
- 50g/1¾oz dried cranberries
To serve
Method
Pour or scrape out the yogurt into a dish in which the chicken pieces can fit in a single layer; I use a rectangular Pyrex dish measuring 32x24cm/13x9½in. Add the sambal oelek, kecap manis, tamarind paste, grated ginger and garlic, followed by the cinnamon, cardamom, ground turmeric, salt and, finally, the vegetable oil, and gently whisk or stir to mix until you have a uniformly vibrant gloop!
Now add the skinless, bone-in chicken thighs to the marinade, swiping them in the mixture so that they’re all coated by it, and leave to marinate while you prepare and cook the onions.
To cook the chicken, heat the oil in a large (and, importantly, wide) pan or casserole, that’s non-stick, sturdy and comes with a lid, and that can take the chicken in a single layer; I use a pan that’s 31cm/12½in in diameter, but if you haven’t got a pan big enough it might be better to cook the chicken in two batches. Cook the onions on high for the first 5 minutes, then continue to cook – stirring frequently – for another 20–30 minutes, turning down the heat if they look as if they’re colouring or crisping up: you want these soft, but pale.
Once the onions are ready, take the chicken pieces out of the marinade with a pair of tongs or a couple of forks, and arrange them bone-side down in the pan, pushing the onions over them as you go. Once all the chicken is in the pan, scrape out any marinade remaining in the dish over the chicken, turn the heat to high, clamp on the lid, and cook for 15 minutes at a fast simmer.
Take the lid off the pan and turn the chicken pieces over, mixing them in the sauce as you do so. Let simmer away robustly for a further 30 minutes, this time uncovered, keeping an eye on the pan, and spooning some of the sauce over the chicken pieces every now and again, until the chicken’s cooked through, and the sauce richly coloured, reduced and thickened, just cleaving to the chicken. You may need to remove the chicken thighs and give the sauce a bit of bubbling on its own if it’s still runny; so much depends on the size of the pan you’re using.
Put the chicken and its scant sauce back in the (now washed up!) dish it marinaded in earlier to cool, then cover and refrigerate overnight or for a couple of days. While you can serve the biryani with the chicken thighs whole, it will go a lot further (and be easier to eat) if you debone them at this stage, tearing them into chunks when you reheat them later.
When you’re ready to proceed with the biryani, whether it’s a day later or two days later, you can make a start on the rice. I begin with scenting the water it’s going to cook in to make the rice gorgeously aromatic. So, drop the cardamom pods into a large pan with a good sturdy base and a tightly fitting lid (I use one of 26cm/10½in diameter, with a capacity of 5.3 litres) followed by the cinnamon stick or sticks, cloves, star anise, desiccated coconut and pink peppercorns – which looks beautifully christmassy. Pour over 2 litres/3½ pints water, add the salt, lime juice and sesame oil and bring to a boil with the lid on. Once it comes to the boil, you can switch the heat off, and leave it on the warm hob, covered, to let the water gloriously infuse.
Meanwhile, rinse the rice and leave it in a bowl covered with cold water to soak for 30 minutes. Towards the end of its soaking time, put the chicken thighs back in the pan you cooked them in to reheat gently, and bring the aromatic water to the boil. And do read Step 13 now as you might want to get started on it at this stage, too.
When the rice has had its 30 minutes’ soaking, drain it well, and use a slotted spoon to add the rice gradually to the boiling scented water; if you dump it in all at once, it’ll make the temperature of the water drop too much. Put the lid on to let it come back to a boil faster (though keep checking it has come back to a proper boil), and once it has, boil for 2 minutes with the lid on. Test the rice is cooked enough by rubbing a grain of rice between your fingers to see if it breaks into 2 or 3 bits, before draining well.
Wipe the pan out well, and brush the bottom with a teaspoon of sesame oil, then spoon in half of the rice. Scatter over half of the toasted cumin seeds, half of the desiccated coconut, and half of the cranberries – not remotely Indonesian, but it is Christmas! – and arrange the re-heated chicken thighs in an even layer on top of the rice, scraping over any sauce that remains in their pan. Cover with the rest of the rice, and scatter again with the remaining cumin, coconut and cranberries.
Make a tight seal on top of the pot with kitchen foil and then put the lid on. Place over medium heat for 4–5 minutes, to let the steam build up – you should be able to hear when it starts bubbling – and then turn down for a further 15–16 minutes more on low, to give it 20 minutes in total. And if you didn’t check out Step 13 when the rice was soaking, lose no time in doing so now!
Turn off the flame (or take the pan off the heat) and carefully remove the foil – you should be greeted with a gentle puff of steam – and replace it with a clean tea towel, then clamp the lid back on, and leave for a further 20 minutes off the heat, though more wouldn’t matter.
I did ask you to make sure you kept the skin from the chicken thighs, and here’s why! While the biryani steams, you magically turn the chicken skin into crisp sheets and shards of crackling. You could fry these in a pan, but if you have an air fryer all you do is cook them at the hottest it will go (after preheating at maximum temperature for 5 minutes) for 12–18 minutes (depending on the model you’re using) in batches as needed, then leave to cool. Do keep the golden chicken fat – the schmalz that the skins give off – for later delicious use.
When the biryani’s completed its steaming, spoon it out tenderly onto a platter or a large dish, arranging the chicken and meat to their best advantage. Scrape out the bottom of the pot well, making sure to add any crispy bits on top. Crumble over the chicken crackling and scatter with freshly chopped coriander.
Recipe Tips
If you don't have an air fryer, remove the chicken skin and fry it in a little oil in 2 or 3 batches for about 5 minutes each side, pressing down on it regularly, until it's a dark gold, has rendered its fat (keep this schmaltz for eating on toast at another time) and is crisping up. Remove to a plate lined with kitchen roll: it will become completely crisp as it cools.